GoatLink and RoadLink DM Installation Instructions
Congratulations! Now that you have one, it's time to install your GoatLink, GoatLink 11 or RoadLink DM (Direct Mount). We know that it looks like a lot, but steps 1-19 should take just a few minutes.
Before diving in, you'll need the following:
Required:
- Protective eyewear
- 5mm Allen key
- Small bladed screwdriver
- Medium Phillips screwdriver
- Rag
Recommended:
- Removable thread locking compound (Loctite 242 or equivalent)
- Torque wrench with 5mm Allen socket
- E-clip tool
1. Mount bicycle in workstand.
2. Disengage rear derailleur clutch.
3. Remove rear wheel.
4. Remove chain from chainring.
2. Disengage rear derailleur clutch.
3. Remove rear wheel.
4. Remove chain from chainring.

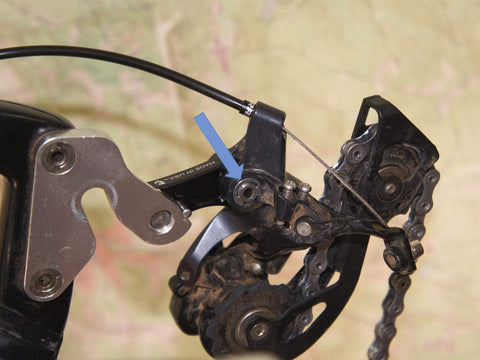
5. If present, use small screwdriver or E-clip tool to remove E-clip from back of Direct Mount screw.

6. Use 5mm Allen key to remove Direct Mount screw from rear derailleur.

7. Use 5mm Allen key to remove Direct Mount link from derailleur hanger.

8. Use rag to clean all surfaces of derailleur Direct Mount knuckle.

9. Use 5mm Allen key or torque wrench to mount GoatLink/RoadLink DM to derailleur hanger and torque to 8-10Nm.
- Note: Take care to ensure that pin rests against derailleur hanger tab.
- Note: Do not use thread locking compound on mounting bolt.

10. Recommended: Apply a small amount of thread locking compound to Direct Mount screw threads.
11. Center derailleur Direct Mount knuckle over threaded hole.
12. Use 5mm Allen Key to start Direct Mount screw in derailleur hanger.
- Note: Direct Mount screw must be located in both sides of the Direct Mount knuckle before threads will engage.
13. Use torque wrench or 5mm Allen key to torque Direct Mount screw to 8-10Nm.

14. If previously removed, use E-clip tool or small pliers to reinstall E-clip on Direct Mount screw.
15. Replace rear wheel.
16. Replace chain on chainring.
16. Replace chain on chainring.

17. Re-engage derailleur clutch.

18. Adjust B-limit screw by:
- Shifting to highest cog
- Pull rear derailleur body rearward to release pressure on B-screw.
- Use medium Phillips screwdriver to adjust B-screw so that, when the derailleur is released, top derailleur pulley sits as close as possible to top cog without rubbing or bumping while pedaling.

19. Adjust shifting as necessary.
20. Go for a ride.