GeoShift Angle Headset Installation Instructions

Tools & Supplies
- Bicycle specific grease
- Crown Race setting system with hammer and correct sized adapter. We recommend using the Wolf Tooth Crown Race Installation Adapter.
- Bearing Cup Press
- 5mm Hex Wrench
- Torque wrench to tighten the bolts on your stem

We would like to point out a few things about the parts included with the GeoShift headset. We’ve included a Star Nut, but if you are using your existing fork, chances are, you probably already have one installed. If you are using a new fork, only install it if your steerer tube is metal. If the steerer is carbon, you will need to use a compression plug.

Next, the upper and lower headset cups have markings to help you figure out which way to install them after you decide if you want the slacker negative 1 degree position, or the steeper plus 1 degree position.
Whichever you decide, the desired degree change should be facing forward when you install the cups.

Now, onto the installation. First, we are going to install the Crown Race onto the fork. If you already have one installed, you must first remove it.
Apply grease around the base of the steerer tube.

Slide the Crown Race onto the steerer tube, with the words facing downward.

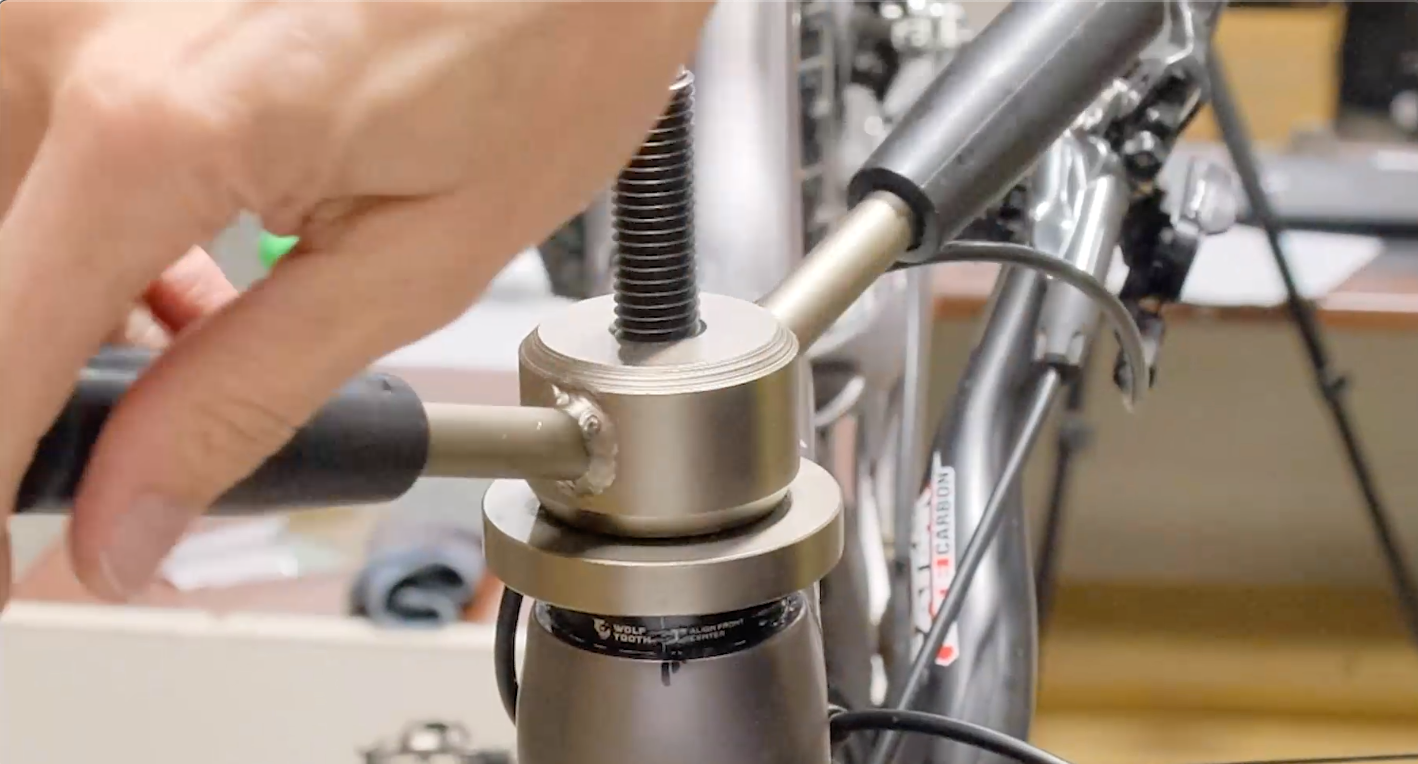
Then, you slide the Crown Race Setting tool with the Adapter fitted on the bottom over the top of the Crown Race.
Hold the bottom of the fork crown with one hand, and use the hammer to knock the Crown Race into place.
You’ll know it’s properly set if, upon inspection, the Crown Race is flush with the top of the fork crown.
You can go ahead and set the fork aside while we prep for the headset cup installation.

Because the GeoShift Angle Headset has an offset that allows for you to change the geometry of your bike, you have to take care to line up the headset cups correctly into your headtube, so it’s helpful to find and mark the centerline of your headtube.
We have found that tying a string to your seat tube or seat post, and pulling it over the center of your top tube, and over the front of your headtube, that you can pretty accurately find that centerline. Go ahead and make a mark on the top and the bottom of your headtube.

Before installing your upper and lower headset cups, make sure apply a light coating of grease to both cups, and to the inside of your headtube.

Make sure that you’re lining up the markings of the cups with the centerline marks that you’ve made on your headtube.
With the correct markings lined up, go ahead and install the upper and lower headset cups, one at a time, using the Bearing Cup Press. Even with the offset of the cups, as long as you keep the tool centered and pay attention to the progress of the install, the cups should level up nicely.
Check to make sure that the cups are flush with the headtube and the markings line up before moving on.

The process is nearly identical for the 2 degree, with the addition of the included drifts for use during installation. Because of the increased offset and angle of the two degree cups we ship these headsets with drifts to keep the headset pressed centered and square with the head tube during the install.

Start by placing the top cup onto the frame with either the plus or the minus pointing forward, followed by the plastic drift. Be sure you have the correct orientation by aligning the plus or the minus on the cup with the plus or the minus on the drift.

Insert the headset press. Double check the cup is aligned with the mark on the head tube, and press the cup into the frame.

Next install the bottom cup. Remember to use both drifts when installing the second cup and keep the cup aligned with the center mark just like before.

Here we are showing again what the orientation of the drift should look like in order to keep the headset pressed parallel with the head tube.

Press the cup in and check that both cups are flush with the head tube and you're ready to continue.

Apply grease to the inside of the freshly installed headset cups, and to the top of the Crown Race on the fork.

Grease your top cap, and set it closeby.
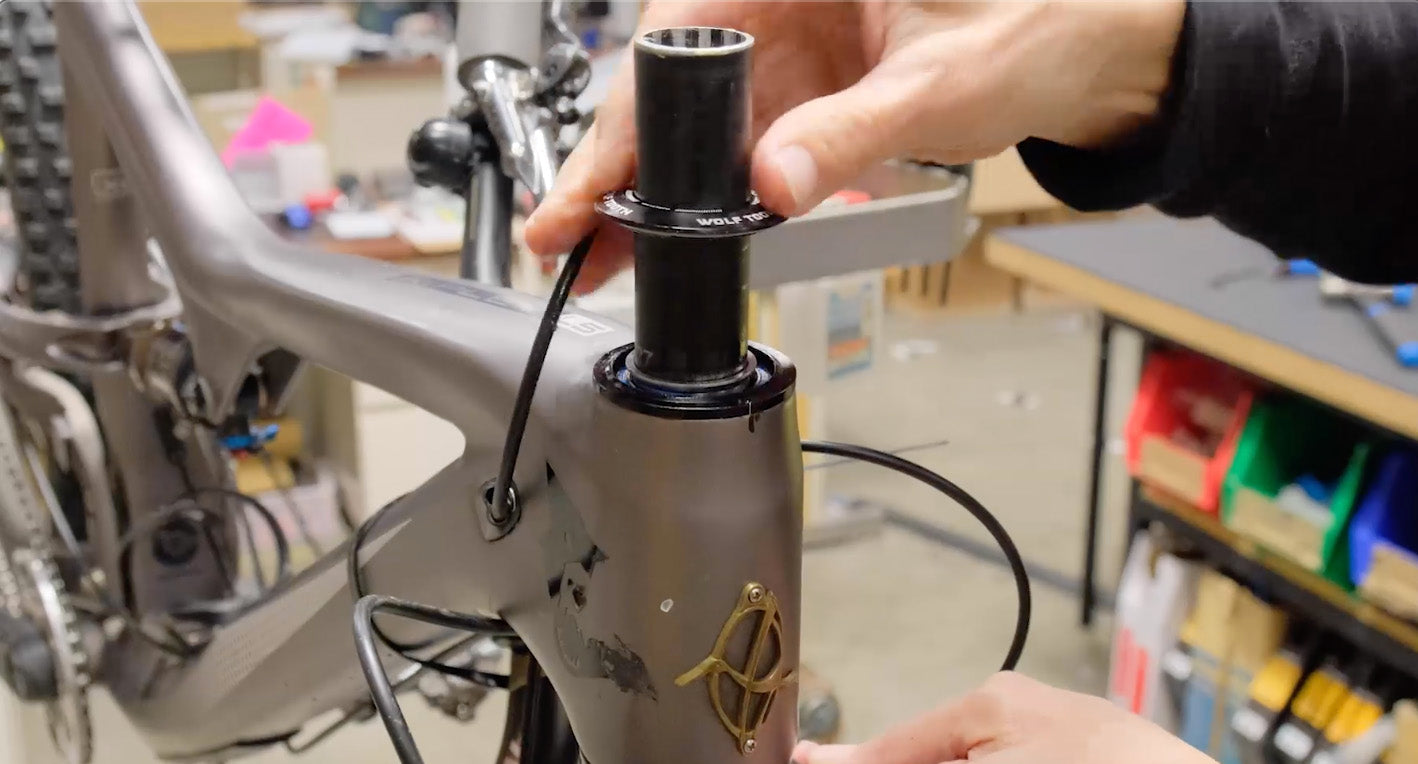
Find the correct orientation of the bottom bearing, and slide it over the steerer tube of your fork. The side with the chamfer, or sloping edge on the outside of the bearing, should be facing up.

Install your fork
Slide the upper bearings with the chamfer facing down over the steerer tube
Slide on the split ring, top cap, headset spacers, and stem. Top it off with any additional spacers you may need, and your stem cap.

Tighten your preload bolt just enough to pull everything together with no play, without crushing your bearings. Straighten your stem, and tighten your stem bolts to the manufacturer’s torque spec.

If you find that the top cap of the headset rubs your headtube or your upper headset cup, and you are feeling resistance when you have everything just tightened enough, you can use any number of the 3 shim washers included with your headset between the top cap and the bearing to add a little height.

Lastly, wipe away any excess grease and use isopropyl alcohol to clean off your centerline markings, and you should be ready to ride!


